-
Steves 289 Build
So my 289 kit has arrived. Ordered Jan 22 and delivered Feb 25th, 2023.
My goal is to build something resembling a 1964 Slab Side car with a USRRC body!
In order to do this I am planning Smiths instruments with a mechanical speedo and a 289 street dash from ACE.
Paint will be a single color probably in the silver/blue.
Kit options
Powder coat
15 Halibrands
Rear brakes
Instrument delete
Blank dash
Planned additions
Russ Thomson - Gas peddle, Turn signals, Dropped Trunk
Instruments - Smiths
Engine - probably Blueprint 302 ~ 360HP
Transmission - Modern Driveline T5Z with forward shift
A couple of pictures from delivery day
039E8687-F7BC-4BE3-952F-AE85AFDAC550.jpgB309A57E-9AAD-4EC4-8AA7-9A9F170DCB24.jpg0F19C733-16AC-4C9D-A681-B0AF5C962877.jpg
-
Post Thanks / Like - 1 Thanks, 0 Likes
-

Steve >> aka: GoDadGo

Congratulations & Welcome To The Family!
-
Post Thanks / Like - 1 Thanks, 0 Likes
-
Welcome from North Carolina!
We odd ones need to stick together.
I just finished inventory and removing the body.
Hop to it!
-
Post Thanks / Like - 1 Thanks, 0 Likes
-
Member

Congratulations and welcome!
-
Senior Member

Once upon a time, 289s were rare. Happy to see more builds in progress, congrats!
FFR #8833 289 FIA 3-link
1965 289, TKO600 from Forte's Parts Connection
Body and Paint by Mike's Auto Restoration
Picked up 3/5/2016, First start 4/22/2017, MA legal 7/11/2018
Build Thread
http://thefactoryfiveforum.com/showt...FIA-build-8833
"Insanity is contagious" - Joseph Heller
-
Senior Member

Jack
289 Roadster complete kit ordered 8/2/21. Delivered 3/14/2022. Chassis #10306. 17"x9" Halibrands, 3.55 IRS, PS, Wilwood brakes, BPE 306 with EFI and close ratio TKX. First start 7/20/2023. First Movement 9/24/2023. First go-kart 9/25/2023.
Build thread -
https://thefactoryfiveforum.com/show...rida-289-Build
-
Slow progress on my build. POL list is fairly short but 2 key items are missing - rivets and IRS fasteners.
Still undecided how to finish aluminum panels. Have Sharkhide on hand but may want to go black powder coat.
Passenger side panels fit together very well but as others have seen the drivers side footbox where it meets the center A panel needs some bending to make it fit well. Harbor Freight tools needed!
03E06E6D-185E-4BBA-BE48-BB2A949E0A45.jpgBAEEB47C-70F4-481E-B029-8B3E4E229860.jpgF207C9E0-9C93-4D58-8E1E-61F528AE29E1.jpg03E06E6D-185E-4BBA-BE48-BB2A949E0A45.jpgBAEEB47C-70F4-481E-B029-8B3E4E229860.jpgF207C9E0-9C93-4D58-8E1E-61F528AE29E1.jpg
-
Senior Member

Having built a 289 FIA car, I think brushed aluminum looks the best and original. I used 320 wet and used water. Sanded in one direction only.
Bill D
-
Post Thanks / Like - 0 Thanks, 3 Likes
-
-

Originally Posted by
2FAST4U

Having built a 289 FIA car, I think brushed aluminum looks the best and original. I used 320 wet and used water. Sanded in one direction only.
Bill D
HI Bill!
Just getting into my build and was curious about panel finish myself and thought brushed aluminum is what I wanted. Did you put a finish like clearcoat on it afterwards? I had not planned to.
Honestly I want my car to look like it has some wear on it.
Also .. got any pictures by anychance?
Thanks,
Fred
-
Senior Member
I did the brushed aluminum as well. No finish afterwards. It looks like a working car which is what I wanted.
FFR #8833 289 FIA 3-link
1965 289, TKO600 from Forte's Parts Connection
Body and Paint by Mike's Auto Restoration
Picked up 3/5/2016, First start 4/22/2017, MA legal 7/11/2018
Build Thread
http://thefactoryfiveforum.com/showt...FIA-build-8833
"Insanity is contagious" - Joseph Heller
-
Post Thanks / Like - 0 Thanks, 1 Likes
-
I used 220 grit sandpaper and an orbital sander to "scuff" my aluminum. Then coated it with Sharkhide.
-
Member

Congratulations and welcome to the 289 club!
289 FIA Complete Kit, ordered September 2021, received February 2022
My plan is to build a tribute to CSX2345 as it raced in Europe in 1964 (with a few personal touches). Follow along as I fulfill a lifetime dream.
Follow my build #10295
https://www.instagram.com/ffr289fia/
-
Senior Member
No clear coat. The goal was to allow the aluminum to age like an original
-
Post Thanks / Like - 0 Thanks, 2 Likes
-
Originally Posted by
2FAST4U
No clear coat. The goal was to allow the aluminum to age like an original
That is my goal as well. Thanks!
... and good luck this coming week. Peacful thoughts from North Carolina.
-
Originally Posted by
Namrups
I used 220 grit sandpaper and an orbital sander to "scuff" my aluminum. Then coated it with Sharkhide.
It looks great!!
-
Post Thanks / Like - 1 Thanks, 0 Likes
-
So I have been making steady progress on my build. All suspension completed. Fuel system and brake systems plumbed. Spent a lot of time on the parking brake and ended up getting new cables and hardware from Amazon because it had individual adjusters for the cables.
IMG_5959.jpegIMG_5960.jpeg
Installed the drop trunk from Russ Thompson (RIP).
IMG_5961.jpg
Starting work on the wiring and I need to make a final engine selection!
Really enjoying the process of building and all of the help and ideas from the forum
-
Working through the wiring. Decided to replace the plastic corregated cover with Flex mesh as I like the look.
Added connectors for front and rear lights/turn signals and tested all circuits. I did find one wire mislabeled on the steering column connector (green wire labeled as radiator fan instead of a turn signal). Used a bench power supply to power the system so I could current limit the supply in case of issues.
Footwell lights installed and functional from light switch.
Russ Thomson turn signal operational and wired to use stalk button for the horn.
A few pictures of the build
Dash wiring
IMG_6141.jpg
Brake clutch reservoirs
IMG_6140.jpg
Brakes have been successfully bled after replacing front cross brake pipe due to a poorly formed flare.
Trunk aluminum in place. The wire in the upper trunk area will provide USB charging power and a trunk light.
IMG_6138.jpg
Steve
-
Project continues to move forward.
Received my dashboard from Nick Acton and installed Smiths instruments.
IMG_6258.jpegIMG_6259.jpg
Decided on a Blueprint 302 Cruiser. Still a lot of HP for what is to be a cruiser!!
IMG_6197.jpgAttachment 19601IMG_6189.jpg
Adding a Holley Sniper 2.
Transmission is a TKX with a forward shift kit and hydraulic throwout bearing.
IMG_6252.jpgIMG_6251.jpg
Installed rear cubby kit from Breeze.
IMG_6200.jpg
This a great project!!
Last edited by SteveWorth; 02-26-2024 at 10:46 AM.
-
Post Thanks / Like - 0 Thanks, 1 Likes
-
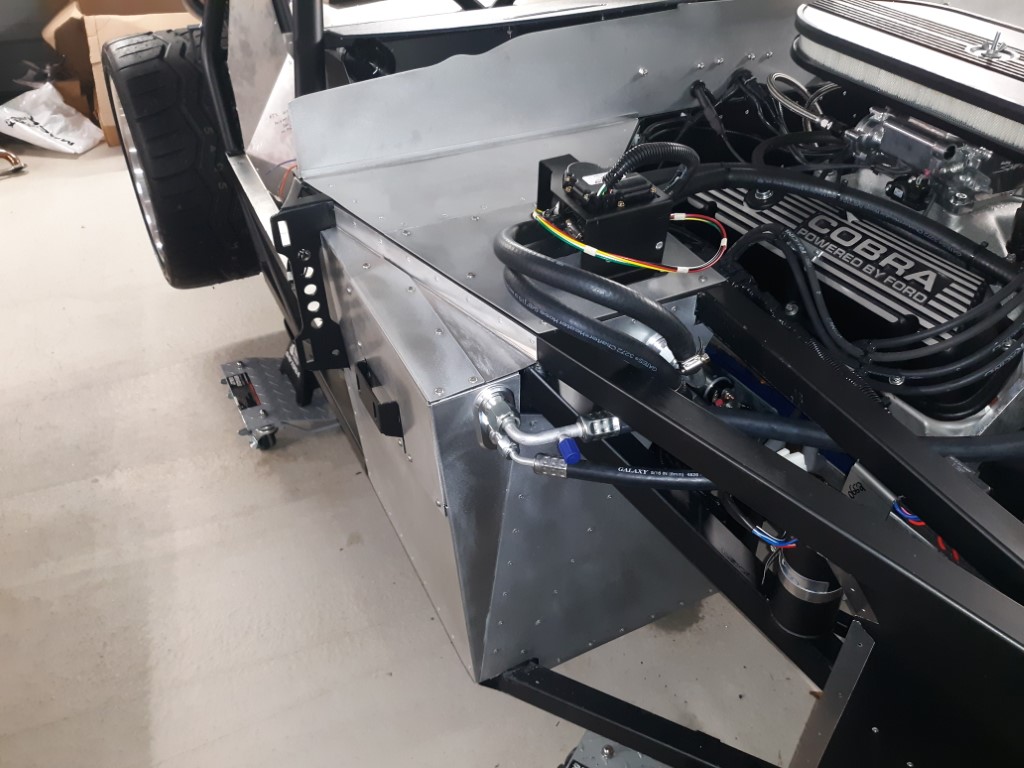
Finally got the engine in the weekend with help form my two sons. First time they were able to assist since one is in Atlanta and one in Boise!
Install went very smoothly then it took the better part of a day to connect everything up.
IMG_6854.jpgIMG_6856.jpgIMG_6858.jpg
Then it was on to trying to start.
Pressurized the fuel system - no leaks! That was a win! Used Evil Energy AN6 fittings and tube without issue.
When we cranked it the first time it was obvious from the spit back through the Sniper 2 that the timing was off.
Pulled the valve cover off and check for TDC compression stroke and sure enough we were 180 deg off.
Reset the distributor and put the valve cover back on.
Cranked again and the engine fired right up!
Have to say I am very impressed with the way the Sniper 2 system operates. Need to check timing with the timing light and get the Forte throttle linkage set up.
Overall a very successful weekend.
IMG_7489.jpg
First start video.
https://youtube.com/shorts/tTgm6hbzK...shLxldVcg0IgCv
Last edited by SteveWorth; 07-04-2024 at 11:57 PM.
Reason: Added first start video
-
Car is on the ground for the first time! Wow those sidepipes are low!!
IMG_6899.jpg
Adjusted the timing by a few degrees using my trusty timing light that I must have had for 40 years or so. Still works fine. I was off by maybe 5 degrees and what a difference that made to the idle. Still very impressed with how well the Sniper 2 is performing - starts right up every time. I'm being a little considerate of the neighbors as to when I start the car as it is so loud with the stock pipes.
IMG_6901.jpgIMG_6902.jpeg
IMG_6898.jpg
Should be ready for a first drive tomorrow!
Last edited by SteveWorth; 07-04-2024 at 06:54 PM.
-
Successful first drive today! Just a short hop to the end of the street!
Seems pretty good!
https://youtu.be/GyTTglNmNw8?si=-tUvFWqvCkr--VMw
https://youtu.be/VWQEG2coap4?si=CP8rkYchXg_81e0o
The neighbors hand waving was excitement rather than “what’s all this racket”!!
-
Post Thanks / Like - 0 Thanks, 1 Likes
-
I'll start a 289 USSRC-style build in a couple of weeks when it arrives in Junction City, OR.
I'm curious what you used to protect the Al after creating the brushed look.
Was the brushed finish used in all areas where the Al shows?
-
I used Sharkhyde on all areas where the aluminum shows. Trying to go for the old car look!
-
Progress continues on the build.
Have had the body on and off a number of times. Its definitely a challenge getting the rear trimmed around the gas tank and also trimming the dash cowl return and the rear deck return behind the seats.
I have found this quite stressful as up to this point in the build any errors can pretty much be corrected by buying a replacement part but trimming the fiberglass is a whole different game!!
Body first pass.JPG
IMG_0004.JPG
IMG_0003.JPG
Ran the engine for a while and am pretty happy with the way its running - https://www.youtube.com/watch?v=R00GxgJ26hE
Steve
-
Post Thanks / Like - 0 Thanks, 1 Likes
-
Awesome post Steve as I am just starting my 289 build. You answered a number of questions I had already posed to my build direction. One question unanswered is what tires fit the 15” wheels? Not much out there but it looks like you figured it out. What did you end up selecting?
-
Senior Member

I’m using 15” pin drive Trigos, went with 245/60/15 and 275/60/15 based on Erik Treves’ build thread. Erik has Hoosiers, I bought bf Goodrich radial TAs.
Jim Phoenix
Coupe-R delivered 8/10/2024
289 USRRC, F5R1011063RD - delivered same day
Coupe-R has a Ford Performance 363 mated to a TKX, 18084.
Many details on my Coupe-R are different from a typical Coupe build because mine is not street legal, race only.
289 has a BP 302 mated to a TKX 18084.
"For a little more, you can do it yourself." - Ed Hollingsworth... 6-Pack forums
-
Thanks!
Tires are as recommended on the Factory Five Parts/Wheels page. Cooper Cobra’s 235/60 15 on the front and 295/50 15 on the rear. They do fill out the wheel wells very nicely!
-
Thank you Steve, I had written down in my notes that FFR recommended 275/50 R15 for the rear but cannot find what I was reading when I put that in my notes. Just double checking before I order the tires…
-
Post Thanks / Like - 0 Thanks, 1 Likes
-
Steve, I'm impressed you have had the body on and off several times. For me it was such a battle I put it on, removed it and put it on again........lots of grunting, swearing, pushing, shoving, sweating.......so I left it on. I'm going to try to title/register mine this fall........just in time for winter.........doh! Maryland winters aren't usually that bad. Fingers crossed for this year's.
Your build looks great.
-
Post Thanks / Like - 1 Thanks, 0 Likes
-
Senior Member

Installing and removing the body can be a pain especially if you are a one man band. I picked up some 1 1/2" electrical conduit at Home Depot and heated it with a heat gun and bent it as shown. Drill holes in each piece that correspond with your hinges and zip tie the pipes to your hinges. As you lower the body down the pipes open the body and lets it slide over the sides and lower frame. I have to thank someone on the forum for this idea, I didn't think of it but it works very well. Makes it easy peasy to put the body on and off. body install.PNGbody install1.PNG
FFR 9883 MKIV ,427 Windsor engine
TKX 5 speed, Three Link 3.55 gears
Power Steering, Leather Seats
18" Wheels and Tires, Drop Trunk
Fun Package
-
clever, I like that work around......thanks. I found the 289 body was particularly troublesome around the rear trunk side aluminum and rear most flat panel. So you're in MD. I assume you registered your Cobra there? I'm about to try that myself. Any suggestions? Sounds like all registration roads go through Glen Burnie.
-
Member

I put my 289 under my 4-post lift, strapped the 289 body to the lift and just lifted it off the frame...easy!
-
Working on getting ready for paint, talked to Ken Pike and plan to get the car to him in July.
Lots of time has been spent doing the rough door, hood and fitting along with the installation of hinges and lights.
IMG_0693.jpgIMG_0680.jpegIMG_0635.jpg
As I do not have a heater I am installing heated seats from Mike Forte. After much thought I decided to install the switches on the Breeze seat mounts so they would not be visible and it works well screw the control relay to the mount as well.
IMG_1095.jpg
Last edited by SteveWorth; 04-30-2025 at 02:16 PM.
289 Roadster Delivered 02/25/2023
Blueprint Engines 302, IRS, TKX


 Thanks:
  Likes:


 Reply With Quote

