
Visit our community sponsor

Thanks:
2

Likes:
22
-
Trans tunnel stuff
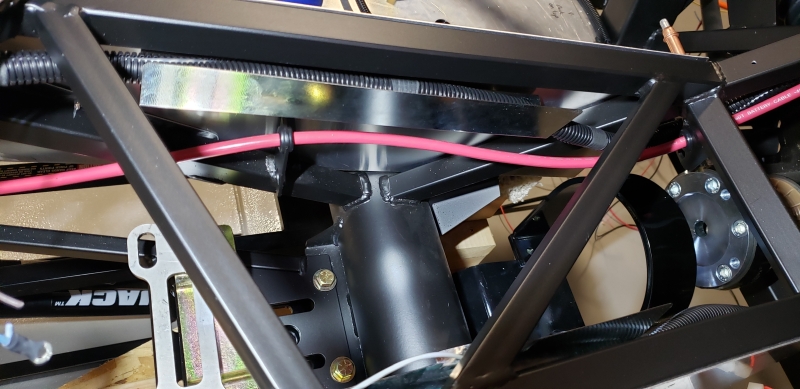
With some of the added electronic goodies I have, I'll have a lot of wiring going back and forth through the trans tunnel. So I test fit the trans A frame, the trans mount, and the drive shaft safety loop just to help reference the amount of free space I'll have. Since I was there I put the drive shaft adapter in as well. I couldn't find any of the spacer hardware with the trans mount... but I'll be more worried about that when I actually have a drivetrain on hand and fitting. Want to get wiring mostly complete and some panels finally finished before that happens. It's hard to see in this picture but I built a couple of Z channels out of galvanized steel for each side of the tunnel to help hold the wire looms out of the way. The loom on the north side of the picture holds all the audio cables... low voltage rca cables to the amp, one rca for the back up camera, and two normal two wire speaker cables. You'll see how I'm thinking I'll route the extra 4g cable from the front battery to power the rear supplemental fuse panel and amp. It's going through some rubber grommets installed in the bracketry normally used for the parking brake cables. I'll add loom later when I'm sure it's what I want to do. On the south side of the picture I have the rear wire harness from the Ron Francis kit.
Trans Tunnel:
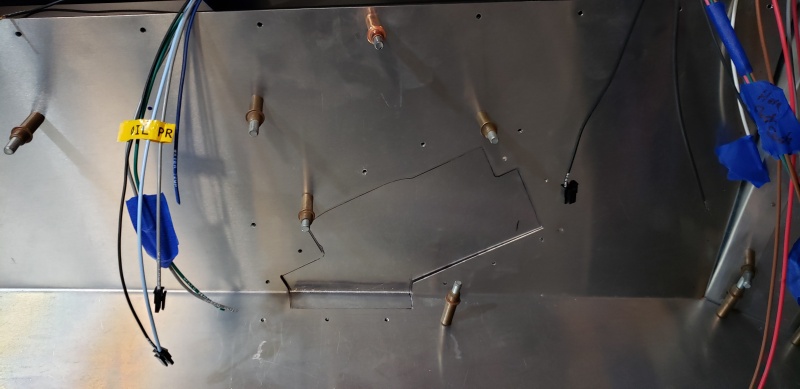
I plugged the ebrake cutout as most do when they aren't using the stock location or go with an electronic version. You can see some of the planned rivet locations for the z channel. They are the ones running horizontally up the middle here.
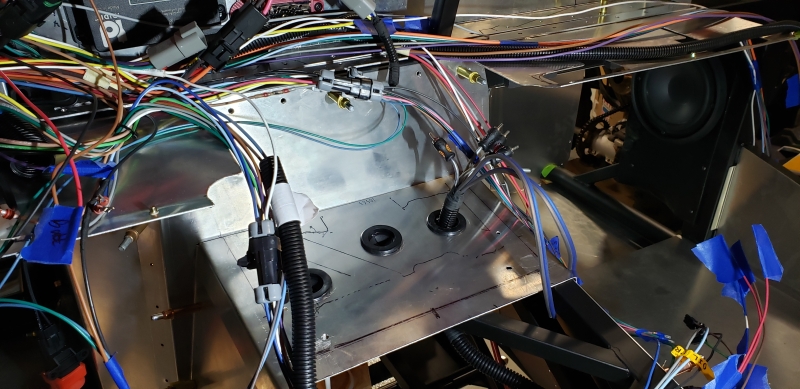
I figure I would likely like to get the tunnel top off for serviceability but that's a challenge with the way the dash overlaps the center console . I could redo the console so it would go up under the dash but I doubt I'd like the finished product there. So for now I'm submitting to the fact that I'll have to take the dash off in order to get behind the console. Better get that wiring done right! With that in mind I chopped the front of the tunnel off to allow it to stay in place while opening the rest of it. You can see the harness carrying the audio stuff poking through the passenger side grommet here. Also look at that wiring mess... sometimes I feel I would have been better off starting from scratch on that harness. I've pretty much taken the whole thing apart.
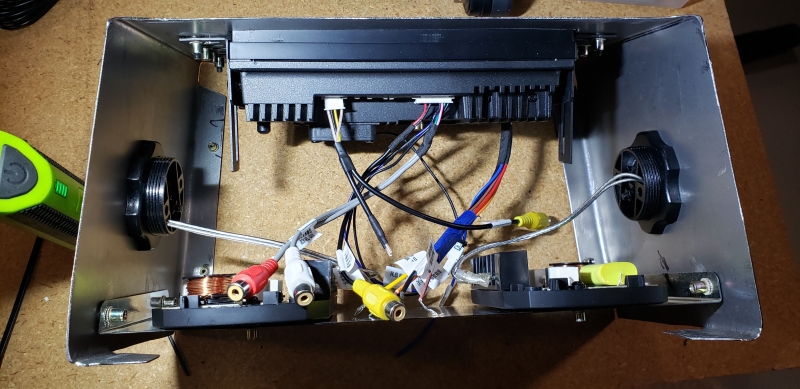
I added a rear panel to the console to mount the cross overs for the front speakers. I also de-pinned all the wires from the stereo harnesses I wasn't using to allow for less clutter once installed. I think I ended up taking about half of them out... even with less clutter it's going to be a challenge to get things hooked up in their final locations here. Again... better get the wiring done right the first time! Lots of testing.
Last edited by topherchrisb; 02-11-2024 at 03:45 PM.
MK4 #10255 project: "Mako"
Coyote Gen 3, TKX, IRS, Wilwood brakes, power steering
Order date: 6/24/21, Received date: 1/12/22, First Gocart date: TBD, Registration date: TBD
Build thread
Tags for this Thread
 Posting Permissions
- You may not post new threads
- You may not post replies
- You may not post attachments
- You may not edit your posts
-
Forum Rules

Visit our community sponsor


 Reply With Quote